The weather on Friday was pretty crappy- the temperature was in the high 20s or low 30s, and it was snowing, so it was heavy, wet snow. Despite this I didn't want to leave it apart for too long, and I also thought the snow would be better to work in than the mud that would be in the driveway the next day.


Miserable weather.

My front seat full of parts and tools. This reminds me that I STILL need to put everything away.

The old control arm, you can see where I had to cut it. Not pictured is the bushing that was encompassed by the cut part. Removing all of this was like peeling an onion made from metal and rubber. The adjustable wrench is 18" in length, which is HUGE, but it actually comes in handy quite often- including as a hammer. You can also see the ball-joint I had to swap onto on the new arm.

Putting the new (not really new, but better bushing) control arm in place. This is the front end of it. The shiny bolt there is replacing the one I had to cut out. Metric hardware is freakin' expensive! The head-size of the new hardware is larger than the head-size of the old stuff, which created a bit of a problem on the other where I had to get a wrench in.
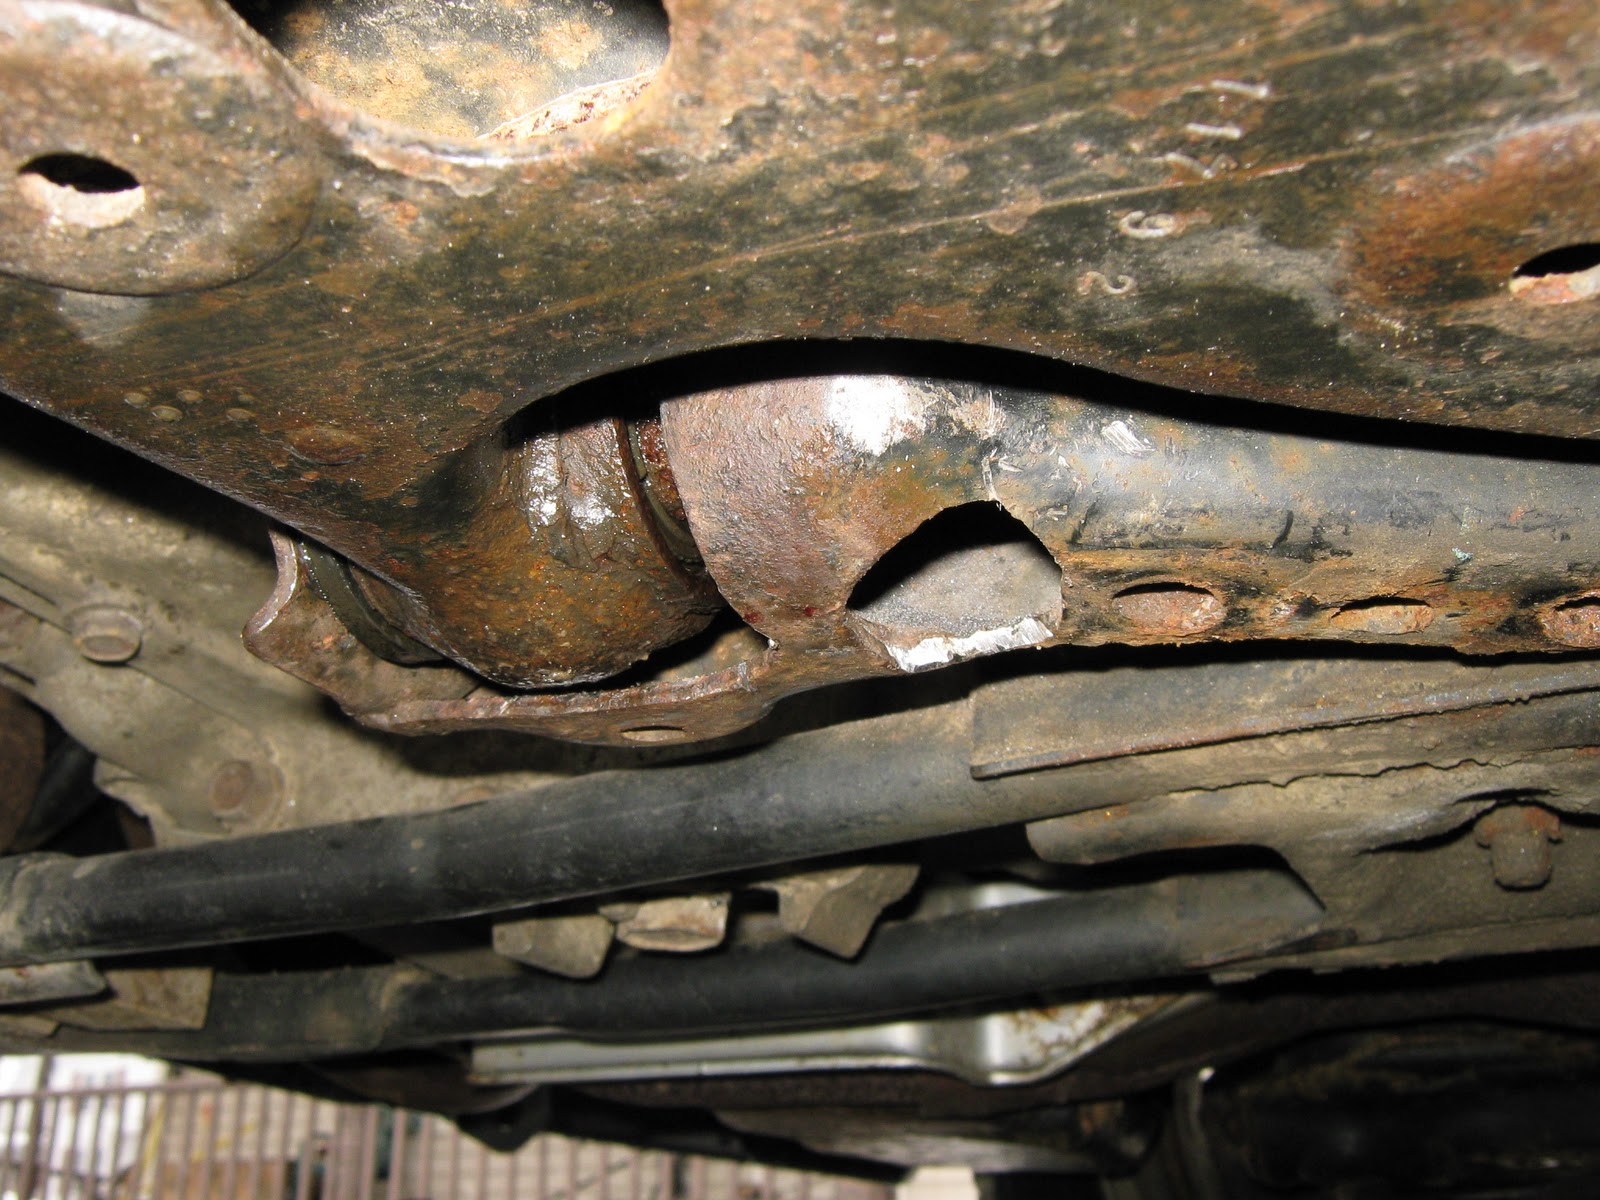
The wrench had to go into the hole that's (roughly) in the center of the picture. The larger wrench required for the larger hardware wouldn't fit, so I had to get my Dremel back out and make the opening a bit bigger. this picture is mid-process. The extension cord visible in the earlier pics was for the Dremel.

The rear-end of the control arm. There's two more bolts across from the visible one. It's hard to see, but there's a tab in front of (closer to the camera) that had to line up with a notch. I got everything tightened, then noticed that these didn't line up (they do in the picture), so I had to loosen the 3 bolts at the rear and remove the nut/bolt at the front (after tightening it once) to get these to line up, then tighten everything back down.

Once I got the new arm in things started going pretty smoothly. I had to cut the old end-link off the sway-bar, and you can see a nice shiny new one on there. The strut is relatively new (a little over a year and only a few thousand miles old), but not from this round of work. At this point all that's left to so is get the other bolt in the strut and tighten them down, put the brake caliper back on, and reinstall a cross-member.

Everything is back together, ready for the wheel to be put back on and to be taken off of the blocking. My hands were FREEZING at this point.

All done, just put the tools on the floor of the passengers side for now. In all it took me about 4 hours to do all this work- there were a few minor hang-ups, but that's to be expected. I was cold and soaked to the bone, but satisfied that I was finished. Took it for a test-drive, which went well- no more lurching when I let the clutch out, no clunking noise, and it went straight down the road. The play caused by the bad bushing made it pull to one side, and the handling was sloppy- it often felt like the car was going to kill me.
On Wednesday when the nut broke free I was overwhelmed, and didn't know how I was going to go about fixing it. It was definitely a good feeling when I worked out a plan and it worked. I could have spent less time on the project if I had a Sawzall instead of a Dremel, but it did the job- and the best part is that I didn't have to pay anyone!
On the previous post about my car sporktar asked me what kind of car it is. It's a 2002 Ford Escort ZX2. They didn't have much in common with the sedans of the era. It's pretty sporty for being a cheap front-wheel drive 4-cylinder. It's been really reliable for me, especially considering some of the abuse I've put it through. I had a '99 ZX2 a few years back, which is where the control arm came from. I parted that one out when the frame-rails, rocker panels, and a couple other parts were rusted beyond repair. RIP '99 you put up with being driven like the General Lee longer than I would expect most cars to put up with.
If you're thinking that the bumper is a different color you're right. Most of the car is flat-black, and the bumper is blue. There's a reason for that, but it's a story for another blog. I still have plenty more work that needs to be done, but isn't urgent. The next thing I'm going to do is replace the other sway-bar end-link, the factory one on the passengers' side is a different length than the new one on the divers' side, which is trowing the handling off a little bit. I also need to replace brake rotors and pads at some point. At some point I need to replace the clutch, which will be a bit of a long project. There are other things as well, I just can't think of them at this point.
Also, I hit 100 followers a couple days ago (I'm at 115 now). Thanks to everyone who follows and comments. Special thanks to those who click an ad once in a while, money is tight for me, so the bit of money I get from adsense helps a lot. Now, time to visit some peoples' blogs!
You did all of this in the snow? I could barely do it in clear weather. Haha.
ReplyDeletegeez, youre pretty handy. Ill have to come to you for advice in the coming weeks when my car surely breaks down.
ReplyDeleteyou should leave your car in the garage broski
ReplyDeletewow, good job dude. Really
ReplyDeleteHoly crap, you're like some kind of mechanic superhero.
ReplyDeleteI wish I had a garage, life would be SO much better.
ReplyDeleteHeeeey, nice one!
ReplyDeleteyeah, you're like a mechanic superhero.
ReplyDeleteWhoa. Your car was a mess.
ReplyDeleteVery good job!
ReplyDelete.
a lot of time on it
hah mechanic superhero. That's a movie I'll watch. - Copyright.
ReplyDeleteWell you certainly seem "handy". Also you have no idea how lucky you are to have a cool property manager like that. I'm not allowed to have friends over.
ReplyDeletePretty impressed you did this all out in the winter without at least having it in the garage. I gotta thank you for putting this up I never knew how to do it.
ReplyDeletegreat post. following!
ReplyDeleteThat must have been INSANE in the snow, especially with all the metals wet/frozen
ReplyDeleteMachine.
OH wow that car looks mad torn apart. Supporting and following. alphabetalife.blogspot.com
ReplyDeleteMan, that looks like a lot of work.
ReplyDeletehopefully u get it done soon enough
ReplyDeletesweeet ride brah
ReplyDeleteThis reminds me, I have to fix the window mechanism in my car :(
ReplyDeleteGOD job :D
ReplyDeletecongrats man, i know all too well how much better it feels to fix it yourself :)
ReplyDeletejust glad i don't have any snow out here though
good job! You're getting there!
ReplyDelete